
Making your first espresso shot at home is one of the most satisfying moments in a coffee lover’s journey. That first pull — watching the dark, syrupy liquid flow into the cup, crema forming on top — is genuinely thrilling. But it can also feel overwhelming when you’re staring at a machine, a bag of coffee, and a tamper for the first time with no idea where to start.
This guide is written specifically for beginners. No jargon overload, no assumption that you already know the difference between pre-infusion and pressure profiling. Just a clear, practical, step-by-step walkthrough of everything you need to know to pull a great espresso shot on your very first try — and dial it in from there.
What Makes Espresso Different from Regular Coffee?
Before you pull your first shot, it helps to understand what espresso actually is — and why it’s made differently from every other coffee preparation.
Espresso is made by forcing hot water at high pressure (around 9 bars) through a tightly packed bed of finely ground coffee. This pressure extracts flavor compounds rapidly — a double shot takes just 25–30 seconds — and creates a uniquely concentrated, complex coffee that regular drip or pour-over methods can’t replicate.
The result is:
- Intensity: Espresso has about 10–15 times the concentration of regular drip coffee in the same volume
- Crema: The golden-brown foam layer formed by emulsified CO₂ and coffee oils — unique to espresso
- Body: A thick, syrupy texture that coats the palate
- Complexity: Simultaneously sweet, bitter, acidic, and aromatic in one small sip
This concentration is also what makes espresso the base for milk drinks like lattes, cappuccinos, flat whites, and macchiatos.
What You’ll Need to Get Started
Equipment:
- Espresso machine — capable of producing 9 bars of pressure. Entry-level options like the Breville Bambino, De’Longhi Dedica, or Gaggia Classic Pro are excellent starting points.
- Coffee grinder — ideally a burr grinder (flat or conical). Blade grinders produce uneven particles that make consistent espresso nearly impossible. The Baratza Encore, Breville Smart Grinder Pro, or Timemore C2 are popular beginner options.
- Tamper — should match your portafilter basket diameter (most home machines use 54mm or 58mm)
- Portafilter and filter basket — comes with your machine
- Digital kitchen scale — accurate to 0.1g. Non-negotiable for dialing in your recipe
- Shot glass or small pitcher — to catch and measure your espresso output
- Knock box — for discarding used pucks (optional but convenient)
- Tamping mat — protects your counter and helps level tamping
Coffee:
- Freshly roasted beans — ideally roasted within the last 7–21 days
- A medium or medium-dark espresso roast — the most forgiving for beginners
- Whole beans (pre-ground espresso loses freshness and CO₂ within minutes of grinding)
Beginner tip: Start with a medium-dark espresso blend from a reputable roaster rather than a single-origin light roast. Blends are specifically engineered for espresso extraction balance and are far more forgiving of minor technique imperfections. Save light roasts for when you’ve got the basics dialed in.
Understanding the Espresso Recipe
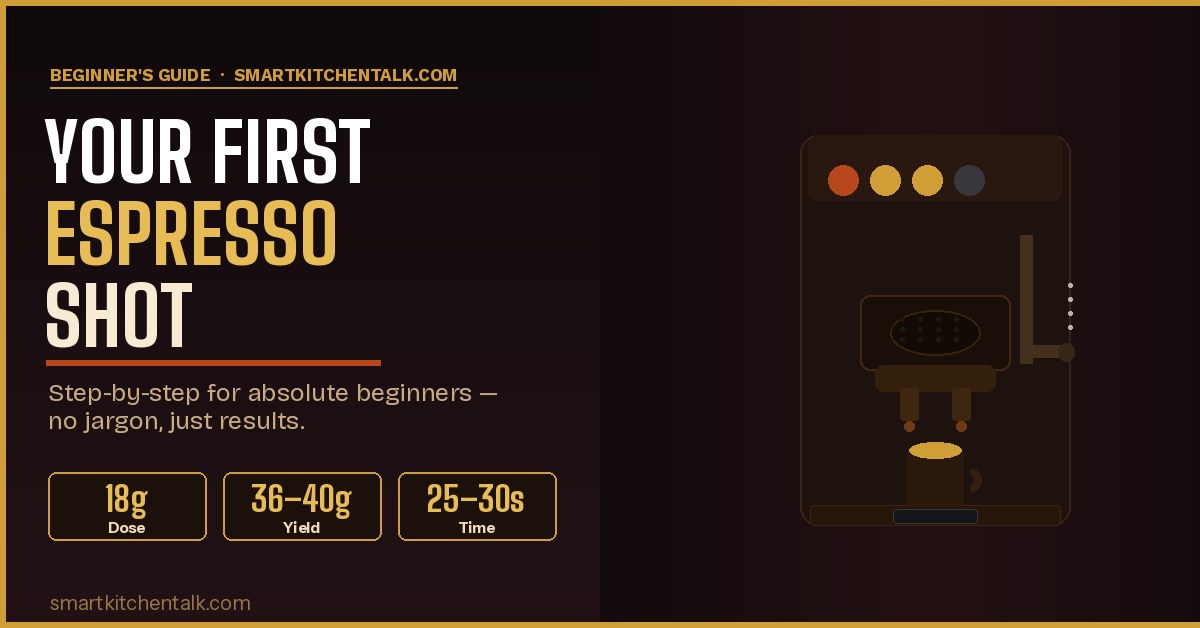
Every espresso shot is defined by a recipe — a set of numbers that describes the inputs and expected output. Before you pull your first shot, you need to know these three numbers:
1. Dose (Input)
The amount of dry ground coffee you put in the basket. For a double shot (the standard for home espresso), this is typically 16–18 grams. Most double baskets are designed for 18–20g — start at 18g and adjust from there.
2. Yield (Output)
The amount of liquid espresso you produce. A standard double espresso yield is 36–40 grams of liquid — which is a 1:2 ratio (18g in, 36g out). This is your target.
3. Time (Brew time)
How long the shot takes to pull from first liquid appearing to stopping the shot. The target is 25–30 seconds. Shorter means under-extraction (sour, thin, fast). Longer means over-extraction (bitter, harsh, slow).
These three numbers are your espresso recipe. Write yours down and adjust one variable at a time when something isn’t right.
Step-by-Step: How to Pull Your First Espresso Shot
Step 1: Warm Up the Machine (10–15 Minutes)
Turn your machine on and allow it to fully heat up before attempting a shot. Most home machines need 10–20 minutes of warm-up time to reach stable brewing temperature. Rushing this step leads to inconsistent water temperature and poor extraction.
While the machine heats up, run a blank shot — push water through the group head without a portafilter — to flush any old water and bring the group head up to temperature. This is called a group head flush and should become part of your routine every single session.
Step 2: Weigh and Grind Your Coffee
Place your portafilter on the scale and tare it to zero. Grind your coffee directly into the portafilter basket and stop when you reach your target dose (start with 18g).
For the grind setting: espresso requires a very fine grind — finer than filter coffee, finer than pour-over, and much finer than French press. If you’re new to your grinder, start at its finest setting and work coarser if the shot runs too slow. More on this in the dialing-in section below.
Grind fresh, immediately before pulling your shot. Pre-ground espresso loses CO₂ — the gas responsible for crema — within minutes of grinding.
Step 3: Distribute the Grounds
Before tamping, the grounds in your basket need to be evenly distributed — no piles higher on one side than another, no gaps or voids. Uneven distribution causes channeling (water finding easy paths through the puck), which produces inconsistent, sour shots.
Simple distribution techniques for beginners:
- Finger-level method: Use your index finger to sweep across the top of the basket, leveling the grounds.
- Tap and settle: Gently tap the sides of the portafilter with your palm to settle the grounds into a more even bed.
- WDT (Weiss Distribution Technique): Use a thin wire tool (or a straightened paper clip) to stir the grounds in the basket — this breaks up clumps and creates an exceptionally even distribution. Highly recommended.
Step 4: Tamp
Place your portafilter on the tamping mat on a flat, stable surface. Hold the tamper like a doorknob — palm flat on the top, fingers curled around the base. Press straight down with 20–30 lbs of even, level pressure. The tamper face should be perfectly parallel to the basket rim when you press.
Give a gentle quarter-turn as you lift the tamper (this is called “polishing” — it’s mostly cosmetic but doesn’t hurt). Inspect the puck: it should be smooth, level, and show no cracks or high spots.
The most common beginner tamping mistake is angling the tamper — even slightly tilting it to one side creates an uneven puck that channels badly. Focus on keeping the tamper perfectly level throughout the entire press.
Step 5: Lock In and Brew
Run a quick 2-second flush of hot water through the empty group head to clear any grounds from the previous shot and stabilize temperature. Then lock the portafilter into the group head immediately and start the shot.
Place your scale with a shot glass on top under the portafilter spouts. Tare to zero. Start the shot and start your timer simultaneously.
Watch the extraction:
- The first 5–8 seconds: No liquid yet — the machine is pre-infusing (wetting the puck)
- Seconds 8–12: A slow, dark drip begins — this is the best, most concentrated part of the shot
- Seconds 12–25: Flow increases to a steady stream — the color should be a rich reddish-brown
- Seconds 25–30: The shot begins to lighten in color (called “blonding”) — stop here
Stop the shot when you reach your target yield (36–40g) or 30 seconds — whichever comes first. The blonding liquid is thin and bitter; letting it run into your cup harms the flavor.
Step 6: Taste and Evaluate
Stir the shot gently to integrate the crema, then taste it straight — no sugar, no milk. Pay attention to:
- Is it sour or sharp? → Under-extracted (grind finer)
- Is it bitter or harsh? → Over-extracted (grind coarser)
- Is it balanced — sweet, slightly bitter, with some acidity? → You’ve nailed it
- Is it thin and watery? → Under-extracted and/or dose too low
- Is it too intense and astringent? → Over-extracted and/or dose too high
Don’t be discouraged if your first shot isn’t perfect. Dialing in espresso takes a few tries. Write down what you tasted, what your numbers were, and what adjustment you’ll make next.
How to Dial In Your Espresso (Fixing Common Problems)
Dialing in means adjusting your variables until the shot tastes right and hits your target numbers. The key rule: change only one variable at a time. Changing grind, dose, and yield simultaneously makes it impossible to know which adjustment made the difference.
Shot is too fast (under 20 seconds) + tastes sour
The grind is too coarse. Water is flowing through too easily without enough extraction. Adjust your grinder one step finer, re-dose, and pull again. Repeat until the shot hits 25–30 seconds.
Shot is too slow (over 35 seconds) + tastes bitter
The grind is too fine. Water is struggling to push through the puck, over-extracting bitter compounds. Adjust one step coarser and try again.
Shot is uneven — one spout runs faster than the other
Channeling caused by uneven distribution or a tilted tamp. Focus on leveling your grounds more carefully and tamping perfectly flat. Try the WDT technique before tamping.
No crema or very thin crema
Most likely cause: stale coffee. Check the roast date on your bag — beans more than 3–4 weeks post-roast lose most of their CO₂. Also ensure you’re grinding fresh immediately before brewing, not using pre-ground coffee.
Shot tastes right but yield is too high or too low
Adjust how long you run the shot, not the grind. If yield is too high (over 42g at 30 seconds), stop the shot earlier. If yield is too low (under 32g at 30 seconds), you likely have a grind-related flow issue — revisit grind size first.
Your First Espresso Checklist
- ☐ Machine fully warmed up (15–20 minutes)
- ☐ Group head flushed before locking in portafilter
- ☐ Coffee beans freshly roasted (7–21 days post-roast)
- ☐ Dose weighed: 18g (adjust after tasting)
- ☐ Grounds distributed evenly in basket
- ☐ Tamped level with 20–30 lbs of pressure
- ☐ Scale tared under portafilter spouts
- ☐ Shot started and timer running simultaneously
- ☐ Shot stopped at 36–40g yield / 25–30 seconds
- ☐ Tasted straight and evaluated for next adjustment
The Essential Habits of Great Home Baristas
Beyond technique, the baristas who consistently pull great espresso share a few habits that make all the difference:
- They weigh everything, every time. Eyeballing dose leads to inconsistency. A 1g difference in dose changes your shot meaningfully. Use your scale every single shot until the numbers become automatic.
- They buy fresh beans and track the roast date. Fresh beans are the single highest-impact purchase decision in home espresso. A perfectly executed shot on stale beans will never taste as good as a decent shot on fresh ones.
- They change one variable at a time. When a shot is off, they adjust grind size or dose — not both. This systematic approach means they learn from each shot rather than shooting in the dark.
- They taste their espresso straight before adding milk. This is how you learn what a shot actually tastes like and how to improve it. If you always drink it as a latte, you’ll never know what you’re working with.
- They keep their equipment clean. A clean machine, clean portafilter, and clean grinder are the foundation of consistent results. Coffee oil residue is one of the most common sources of off-flavors that beginners attribute to bad technique.
- They’re patient with themselves. Espresso has more variables than almost any other cooking or beverage preparation. Dialing in takes a few sessions. Every “bad” shot teaches you something valuable.
What to Make With Your Espresso
Once you’ve pulled a shot you’re happy with, the world of espresso-based drinks opens up. Here are the most popular options to try next:
- Americano: Dilute your double shot with 120–150ml of hot water. Closest to a regular coffee in volume, but with espresso’s depth of flavor.
- Cappuccino: Equal parts espresso, steamed milk, and thick milk foam (60ml each). Classic Italian breakfast drink.
- Latte: Double shot with 180–240ml of steamed milk and a thin layer of microfoam. The most milk-forward of the espresso drinks.
- Flat White: Double (or ristretto) shot with 120ml of velvety microfoamed milk — less milk than a latte, denser texture.
- Macchiato: Your double shot “stained” with a small dollop of foam or a splash of steamed milk — just enough to soften the intensity.
- Cortado: Equal parts espresso and steamed milk (60ml each) — no foam. Balanced, smooth, and intensely coffee-forward.
Frequently Asked Questions
Do I need an expensive machine to make good espresso at home?
You need a machine capable of producing consistent 9 bars of pressure and stable water temperature — but that doesn’t require spending thousands. Machines in the $250–$500 range (like the Breville Bambino Plus, Gaggia Classic Pro, or De’Longhi Stilosa) are fully capable of producing excellent espresso when paired with fresh beans and proper technique. Spend at least as much on a quality burr grinder as you spend on the machine — the grinder has equal if not greater impact on shot quality.
How fine should I grind for espresso?
Espresso requires a very fine grind — finer than table salt, roughly the texture of powdered sugar or fine sand. The exact setting varies by grinder model. Start fine and work coarser until your shot hits the 25–30 second target. If your grinder has numbered settings, espresso typically sits in the 1–5 range on most home grinders.
Why does my espresso taste sour?
Sourness is the hallmark of under-extraction — the water moved through the coffee too quickly and didn’t dissolve enough of the sweet, balanced compounds. The most common fix is grinding finer. Also check your dose (too low) and water temperature (too cold, if adjustable on your machine).
Can I use pre-ground coffee for espresso?
Technically yes, but results will be noticeably inferior. Pre-ground coffee has already lost most of its CO₂ (which means little to no crema) and the aromatic compounds that make espresso special begin to dissipate within 15–30 minutes of grinding. If you must use pre-ground, buy it in small quantities, seal it tightly, and use it quickly.
How many shots should I pull while dialing in?
Expect to pull 3–6 shots when dialing in a new bag of coffee or after changing grind setting significantly. Each shot tells you something — taste, time, yield. Make one small adjustment between each shot and document your numbers. Once you’re in the sweet spot, your recipe becomes your baseline for that coffee.
Why is there no crema on my first shots?
The two most common causes are stale coffee (beans more than 3–4 weeks post-roast) and grinding too coarse (insufficient pressure builds up during extraction). Check your roast date first — this fixes the majority of crema issues instantly. Then verify your grind is fine enough to slow the shot to 25–30 seconds.
Final Thoughts: Your First Shot Is Just the Beginning
Making espresso at home is a skill — one that develops quickly with practice and the right approach. Your first shot might not be perfect. Your fifth shot will probably be pretty good. By your tenth, you’ll have a feel for your machine, your grinder, and your beans that no guide can fully teach — only experience gives you that.
The most important thing is to start. Pull the shot, taste it honestly, write down what you observe, make one adjustment, and pull another. Espresso rewards curiosity and systematic thinking more than any other home cooking skill.
Welcome to the rabbit hole. It’s a wonderful place to be.
Pulled your first shot? Tell us how it went in the comments — we’d love to hear about your first espresso experience and help with any questions!